knitsewcraft.co.uk - Hints and Tips
Welcome to our Knit Sew & Craft's Hints & Tips page. Here you will find some helpful hints, tips and useful info for sewing, dressmaking, knitting, crochet and crafts
Need any help with your order? Our website has been designed to be quick and easy to use, and navigating through the checkout payment system should be a breeze. If you are unsure of anything and require assistance regarding a particular product, please email via our "Contact Us" page
Pre-Folded Satin Blanket Binding ~ Versatile Quilt Edging Ribbon
Blanket binding ribbon is a fantastic classic product for repairing worn and frayed blanket edges, or adding a smooth, professional finished edge to home-made quilts and baby pram rugs. The fabric trim will add colour and impact to your design project. Available in gorgeous pastel shades: Baby pink, baby blue, peach, lemon yellow, deep pink, white and ivory/cream. Choose a colour that best compliments your baby blanket or quilt. We stock both pre-folded 36mm satin blanket binding, and 72mm unfolded satin ribbon in a wide range of fabulous colours and ours is one of the few satin trimmings that is still manufactured in Great Britain. Please Click here to view our range of pre-folded satin blanket binding ribbon
This versatile fabric ribbon trimming is also used to create edges around household linens, bibs, placemats, and home furnishings, for seam binding, dressmaking and applique craft projects. Soft to the touch, perfect for adding a new luxurious edging trim to make do and mend projects. There are a great many helpful tutorials available on the internet for attaching blanket binding but we have added a few helpful hints below…
To calculate how much blanket binding ribbon is required for your project, measure all four sides of your blanket/quilt. As a general rule, you will need to multiply the length of one side by two, and the width by two, then add up the total amount to calculate the required quantity of ribbon. It is always best to add slightly more ribbon to the total measurement, in order to be absolutely sure you will have enough blanket binding for your project
Satin blanket binding is often machine-stitched onto the blanket using a decorative, blanket stitch (if your machine has one), zigzag stitch (2.5 stitch length and 3.5 width), or straight stitch setting. It is advisable to test first on a sample (quilted) fabric scrap to make sure that you are completely happy with the length/width of the stitching before stitching the "real thing". A "walking foot" may help to achieve a good result when machining. Hand sewing may result in a "puckered" finish. Generally, clear (invisible), or matching colour thread is used. Blanket binding is usually applied at the head and foot of the flat piece of fabric, but it can be first securely pinned, using fine dressmakers pins applied perpendicular to the edge of the binding (to prevent puckering), then stitched all the way around. The 36mm pre-folded satin blanket binding is usually supplied with the fold slightly off centre and it is the "shorter" side of the ribbon that you will need to keep on top as you machine stitch the blanket
Stitch slowly to sew a straight line and catch the top and bottom edges of the blanket when you stitch… If the bulk of the quilt/blanket causes the binding ribbon to pucker, or the stitching is inconsistent, you will need to loosen the upper and lower thread tension to reduce puckering. You will need to create neat, mitred corners on the blanket and backstitch the mitred pleats into place…
How To Darn A Sock Using A Darning Mushroom Tool
We have been selling Prym darning mushrooms for many years and, together with our carded darning wool, it is one of our most popular haberdashery products. The red painted mushroom cap with its white spots on the top has not altered much over the years. The tool is a pretty addition to your sewing/mending box and is an attractive alternative to the traditional (and rather boring) plain darning mushroom used in past times. In these times of austerity, it is always preferable to make do and mend, rather than throw away easily repairable socks, gloves and knitwear. Darning socks is a little bit like weaving and, with practice, your technique will greatly improve
Here is a brief guide to darning a sock using a darning mushroom, darning needles, darning wool and a great deal of patience:
The best needle to use for a darning project is a size 14/18 darning needle because the "eye" of the needle is of a reasonable size and the sewing point is ideal (a knitters bodkin needle is better used to sew up seams in newly knitted sweaters as it will usually have a thicker blunt end rather than a point). Select a darning thread that is close to the colour and thickness of the sock that you are darning. When you are ready to begin darning, carefully stretch the sock or knitted item over the domed cap of the mushroom tool, then gather securely around the stalk to hold in place with your non-sewing hand. The hole of the knitted piece should be in the middle of the mushroom cap. Thread your needle with the darning wool. It is advisable to use a long piece of yarn to avoid unnecessary breaks and joins in the thread. The patch of darning work should exceed the outer edges of the hole (by approximately ½" but this depends on the size of the sock) and it is better to keep the patch square wherever possible. It is not usually necessary to knot the end of the yarn if the patch is "weaved" tightly enough as this should hold the thread in place. However, if you prefer to knot the end of the yarn, pull the thread through and leave approximately ½" to 1" of yarn that can be snipped off later. Begin by inserting the darning needle in the "good" part of the knitted garment approximately ½" away from the hole. Work several rows into the unbroken/good part of the knitted item all around the outside of the hole to be patched. Next, commence sewing a running stitch across the hole. Carry on sewing running stitches until the hole is completely covered with a framework of parallel stitches. Keep your thread reasonably tight and your stitches neat in order to avoid bumps in the weave
You will now need to repeat the stitching by working in the opposite direction across the parallel stitches, weaving in and out of the framework of stitches that have previously been sewn. Fill in any gaps by weaving the running stitch through them, until the hole in the sock is totally covered with a tight weave. It is best not to secure a knot to finish, simply weave the end of the thread into the finished woven framework of stitches
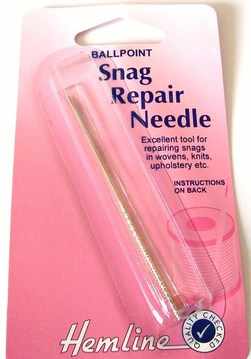
The Hemline snag repair needle is a super handy gadget to keep in your sewing box/knitting bag. To use, simply insert the ball pointed end of the needle directly into the centre of the snag. Gently push needle through fabric. Whilst pulling needle out from the back of the fabric, twist needle slightly
How To Use A Tracing Wheel On Tracing Paper
There are two types of tracing wheels available to dressmakers, one with a toothed/serrated (spiked) metal edge, and one with a smooth edge, like a flat round disc. In addition to this, double tracing wheels have two serrated wheels and allow sewing/seam lines and cutting edges to be marked at the same time and are particularly useful for marking decorative stitching work. It is advisable to use a firm padded surface, such as a cutting mat, beneath your fabric, to avoid damage to furniture. The choice is an individual one - a serrated edge wheel is more popular than a smooth edge because it will make dotted marks on your fabric that are usually easier to remove. Smooth edge tracing wheels will make a solid line on your fabric when used with tracing paper
Smooth edge wheels are best for delicate fabrics that snag easily, and serrated edge wheels are suited to closely woven materials. We sell a comprehensive range of tracing wheels and the Prym premium quality tracing wheel has a comfortable, smooth wood handle, and serrated edge. Whilst holding the handle of the tool, the tracing wheel can be moved around and used to create buttonholes or to transfer markings and designs from patterns to fabric when creating garments. The tracing wheel can be used with/without tracing paper. When the tracing wheel is used to trace a garment pattern onto tracing paper, the paper is first cut, and then placed on to the fabric. The fabric is then carefully cut along the pattern (sharp dressmakers shears are ideal for large pieces) and sewn together to create a garment. The tracing wheel also makes slotted perforations and markings by carefully applying pressure. These markings might include pleats, buttonholes, darts, or placement lines for pockets. Tracing wheels are also handy for quilting and patchwork projects
Helpful Hint: Care should be taken if using a tracing wheel to mark patterns on some special materials, such as vinyl or leather and it is best to use a smooth edge wheel on such fabrics, in order to avoid leaving visible marks on the finished garment. If you are using tracing paper to mark a buttonhole, be careful not to over-mark. Because buttonhole marking is done on the right side of the fabric, you need to avoid causing additional marks on the fabric. For ladies garments, buttonholes should be marked on the right hand side, mens shirts are always marked on the left hand side
How To Use Prym Dressmakers Tracing Paper
Prym dressmakers tracing paper is a superb quality paper that has certainly stood the test of time. This product, which is available in our shop, is easy to use and here is a quick guide: Before commencing tracing, test on a fabric sample that markings can be removed (washing or dry cleaning will usually remove any trace of the lines). Place the tracing paper on the surface/cutting mat with the coloured side facing upwards. Place the fabric on top with the wrong side facing downwards. Pin pattern piece on to the fabric, and carefully trace lines with a tracing wheel, exerting a little pressure. Trace each of the marks with your tracing wheel so that all of the pattern design is transferred to the tracing paper. Carefully cut the tracing paper according to the layout instructions, to fit the required measurements
How To Use Fusible Interfacing/Fabric Interlining
Fabric interlining, also known as interfacing, is not a very exciting product, but it is an extremely useful one! Good quality interfacing is quick and easy to use. Interlining is a third layer of fabric applied between two other layers. It enhances durability and gives shape, stability, definition & structure to lapels, waistbands, necklines, selvedges, and plackets. It is used in buttonhole areas to keep them from stretching and distorting, in collars and cuffs to add crispness, and in handmade fabric/knitted bags and facings to give stability. In tailoring, it allows the garment to retain the shape that is built in during the construction process
What Material Is Suitable? Non-fusible (sew-in) interfacing is a better choice for highly textured/open weave fabrics and those fabrics that cannot take the heat of an iron. Fusible interfacing is not generally suitable for metallics, beaded, sequined fabrics, napped fabrics such as velvet and fake fur, brocades, leather, vinyl, seersucker, loose or open weave fabrics such as lace and mesh. However, for these types of fabric, sewn-in interlining is an alternative choice. Sewn-in interfacing is hand stitched or machine stitched on to the main fabric and is the ideal choice for sewists who are new to the process of using interlining. Most interfacings are not washable, so you may want to wash the fabric first
Choosing Interfacing: Fabric interfacing is available in different weights, light, medium, heavy and colours (black/white). There two main types of interfacing are, as mentioned, fusible and sew-in. It is very important to choose the correct type of interlining for your garment or project as it will affect the appearance of the finished article. If you are working to a pattern, this will normally indicate if interlining is required and the correct weight to use. We have a comprehensive range of quality fabric interfacing available in our shop, to view them, click here
Which weight do I use? The weight of the interfacing should generally be the same as the fabric, or slightly lighter. As a rule of thumb, you should not use a heavier weight of interlining than your chosen fabric. Therefore, if you are using a medium weight fabric, then you should opt for medium weight interfacing
Which colour do I use? Our interfacing is available in black/charcoal and white/off white. Simply choose the appropriate shade that closely matches your fabric. Although the interlining is applied to the inside of your chosen fabric, if you use a dark interlining on a light fabric, or a light interfacing on a dark fabric, it might be visible and look unsightly
FUSIBLE/IRON ON INTERFACING: Fusible interfacing is a little easier to use than the sew-in type, especially for beginners. Beginners to using interfacing generally often select fusible, rather than sewn-in, because it is easier to handle, particularly when getting to grips with working on several layers of fabric. Fusible interlining is coated with an adhesive on one side which bonds with the fabric when applied with an iron, due to the combination of heat and steam. The adhesive coated side of the fusible interlining is applied to the wrong side of the chosen fabric
How hot should I set the iron when using fusible interfacing? When choosing the heat setting for applying fusible interlining, the "wool" temperature setting is generally used for medium and heavy weight fabrics. For lightweight fabrics, you should opt for a heat setting that is a little higher than that which you would use directly on the fabric. See below for our important note about using a press cloth as a protective layer. Great care should be taken when selecting the iron temperature and ensuring that it is correct for your chosen fabric. If it is too low the fusible side of the interlining will not bond with the fabric and if it is too hot the chosen garment fabric may be damaged. More guidance is provided below….
Testing Testing Testing! We cannot stress how important it is to test a sample piece of your chosen fabric with the purchased interfacing, before you apply interlining to your main fabric, to ensure it is suitable for your project. Manufacturers of interlining do not generally mark which side of the sheet is fusible. Interlining is usually fusible on one side only. As a general rule, the side of the fusible interfacing that has the adhesive on it normally has a slightly bobbled/or raised appearance, or may be a little "shiny" from the coated glue
The Golden Rule - Always Use A Press Cloth and Press – Don’t Iron. When using fusible interfacing, make sure that you press the interlining on, and do not iron it on by moving the iron across the fabric surface, as this may cause a "bubbling" effect. It is advisable when applying fusible interfacing that you use a press cloth or damp tea towel (not too wet) to protect your fabric from the heat and to avoid the fusible glue coming into contact with the iron plate. Experience has taught us that it is also handy to slip a piece of scrap fabric, beneath the main garment fabric and the ironing board surface, so that the ironing board cover stays clean and free from messy glue
MORE ABOUT APPLYING FUSIBLE (IRON ON) INTERFACING: Applying fusible interfacing requires patience but once you get the hang of it, you'll wonder why you hadn't used it before. Fusible interfacing usually has two sides, one that is smooth and one that is not so smooth. Before fusing the interfacing to the fabric, take some scrap pieces of the interfacing and the fabric and experiment to find the timing and technique that works best for you and your project
Ready, Steady, Here We Go! For lightweight fabric and interfacing, set the iron temperature a little higher than what is recommended for the fabric (using a press cloth will protect it from the extra heat). For medium to heavyweight fabric and interfacing, set iron to wool. Let the iron heat up to ensure it’s nice and hot. Place fabric piece on ironing board wrong side up. Centre the interfacing on top of it, adhesive side down (the adhesive side is usually a shiny side or has raised bumps on it). If you did not pre-shrink the interfacing prior to cutting it out, steam shrink it now by placing your iron over the interfacing piece (without touching it) and steam it for a few seconds. Steam-baste the interfacing in place by touching it in several places with the tip of your iron. This will bond the interfacing lightly to your fabric so that it will not move during the fusing process. Dampen the press cloth using a spray bottle – making it evenly damp, but not soaking wet. Place press cloth on top of the interfacing. Place your iron straight down onto one section of your fabric piece and apply a firm, even pressure. Do not slide your iron around
Lightweight fabric and Interfacing: Press and hold for about ten seconds. Medium to Heavyweight fabric and Interfacing: Press and hold for ten to fifteen seconds. After the time has elapsed, lift iron. The press cloth should be dry. If it is not, raise the iron temperature or leave the iron on the fabric piece a few seconds longer. Then place the iron straight down onto the next section to be fused, overlapping some onto the first section. Press and hold for the appropriate time. Lift your iron and repeat this process until the entire piece has been pressed. Then turn the piece over and iron it on the right side. Leave your fabric piece in place until it has cooled completely. Moving the piece while it is still warm can interfere with the bonding process
LAST, BUT NOT LEAST - WHAT ABOUT SEWN- IN (sew in) FABRIC INTERFACING? If you are using special fabrics, such as velvet, beaded, sequin or vinyl, the best option is a sew-in interlining. Sew-in interfacing is relatively easy to use - just cut the interfacing to size slightly smaller than the pattern piece and carefully tack or pin to fabric before making your garment as normal. This product can also be used to trace and cut your basic patterns. Please note, this information is for guidance purposes and we do not accept any responsibility for damage caused by handling/using fusible interfacing/interlining products
How To Use Vilene Bondaweb
Trace or draw the motif design on to the paper side of Bondaweb. Place adhesive coated side down onto the wrong side of the fabric. Dry iron for approx. 5 seconds to transfer the adhesive web from the backing paper to the fabric. Lay the adhesive coated size down, cover with a damp cloth, and iron on step by step for 15 seconds in each area, pressing down firmly. Leave to cool. Cut the motif out and peel off the backing paper
How To Use Vilene Stitch 'N' Tear
Vilene Stitch 'N Tear is a white colour tear away backing for all types of decorative needlework. Ideal for machine embroidery, appliqué, monogramming, cutwork and relief quilting. Stitch N Tear provides a better way to support decorative needlework, preventing fabrics from puckering, giving smooth finished edges and adding stability to the design. This product is washable to 60 degrees, may be tumble dried, and is dry cleanable. Easy to follow users guide:
Attach a piece of Vilene Stitch N Tear that is slightly bigger than the motif, to the wrong side of the fabric. Next, tear off the excess Stitch N Tear. Embroider your design. To help create high relief quilts and quilted effects, the motif can first be drawn on to the Stitch N Tear. The non-woven is then attached to the handicraft item or garment, the motif is sewn on and, finally, the Stitch N Tear is torn off
How To Use Horsehair Braid
Hemline horsehair braid is a super product that stiffens and supports hem edges so that they flair and is ideal for bridalwear and evening wear. This product, available in our shop in a 15mm and 25mm size, is both washable and dry cleanable. To use the horsehair braid, you can either follow the instructions on the back of the pack, or as printed here: Before applying the horsehair braid, carefully steam press it to remove any creases (use a low heat, do not use a hot iron). Mark hemline, trim allowance to 6mm (¼"). Using a long machine stitch, ease stitch one edge of braid. On right side of garment, align unstitched edge of braid with hemline, fold ends of braid under at seam. Stitch close to edge of braid. Turn braid up along hemline and baste close to fold. Pull ease thread to draw up fullness; press and pin. Slipstitch free edge of braid to garment; whipstitch abutted braid ends together. Press hem carefully
How To Trace Patterns Using Iron On Pattern Pencils
If you want to use a iron on pattern pencil to trace your design, we do have the Prym iron on pencil available. How to use the pencil: Place transparent paper on pattern then trace lines with the iron-on pattern pencil. If your pattern or design has to appear as drawn, then turn over the transparent paper and trace again to create a mirror image - do this with a text design as well as a picture design. Apply colour firmly and gently blow away any "crumbs". Place transparent paper with "final marking" face down on the fabric and iron over the motif from the reverse. It is important that you do not draw directly on to the fabric
What Is Tatting?
Dating from the early 19th Century, tatting is a method of making lace edging, doilies, bookmarks, baby bonnets, booties, and bridal veils from fine thread. Tatted craftwork includes decorative edgings on handkerchiefs, purses, pillow cases, placemats, cards, and clothing (especially collars). Lightweight, comfortable to hold & easy to work with, we stock Pony and Prym tatting shuttles (click here to view). Ideal for creating elegant handmade, durable lacework and filet crochet pieces by looping and knotting with a single thread of yarn. The lace is formed by a pattern of small rings and chains. Tip: plain plastic shuttles are great if you want to bling them out and decorate with your own style of decoupage
Twilleys Freedom Knitting Wool - Corsage Flower (knitted)
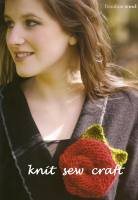
This corsage flower is perfect for jazzing up your favourite coat, or jacket. The pattern is available inside Twilleys knitting patterns Book 463, which is for sale in our shop, in the "knitting patterns and books" category
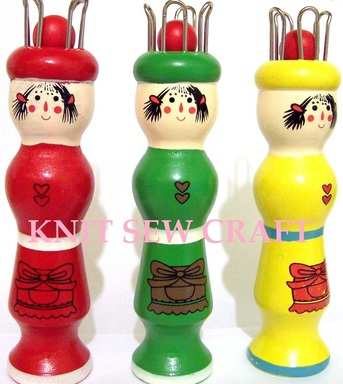
How To Knit With A French Knitting Dolly (Knitting Nancy or Knitting Bobbin)
French knitting dollies, also known as a Tricotin or Knitting Nancy, seem to have been around forever. Keep up this traditional fun craft by teaching your child/grandchild to knit with a French knitting dolly. We sell authentic and modern dollies, the choice is yours and basic instructions are provided on this page:
French knitting is simple and great fun! You will need some yarn and a French knitting dolly. Begin by threading the end of the yarn down through the top of the dolly, so that approximately 10cm hangs out of the bottom. Wind the yarn twice, anti-clockwise around one of the metal spikes located on the top of the dolly. Try not to pull the yarn too tight otherwise you won't be able to "knit". Using the wooden "pin" provided with the dolly, hook the bottom loop over the top loop and drop it over the spike into the centre of the dolly. Turn the dolly anti-clockwise so that an empty spike is towards you. Wind the yarn twicearound this spike anti-clockwise. Using the wooden pin, lift the bottom loop over the top loop, into the centre of the dolly, turn the dolly anti-clockwise so that an empty spike faces you. Wind the yarn twice around this spike, anti-clockwise. Using the wooden pin, lift the bottom loop over the top loop, into the centre of the dolly. Turn the dolly anti-clockwise so that the fourth and final empty spike faces you. Wind the yarn just once around the spike anti-clockwise. Using the wooden pin, lift the bottom loop over the top loop, into the centre of the dolly. Pull the end of the yarn that hangs out of the base of the dolly, to tighten your work. Repeat the French knitting until the woollen chain is the length required
The Art of Knitting
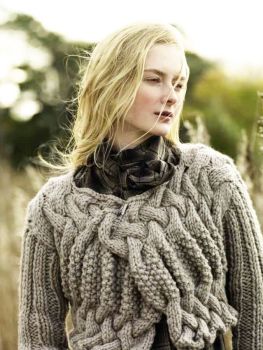
Get creative and cast on for comfort! Knitting and crochet are one of most therapeutic artistic pursuits and we stock great quality yarn for your project. Browse our gorgeous range of lovely knitting wool and crochet yarn from top brands including Sirdar, Hayfield, Stylecraft, Himalaya, Robin, Wendy, Peter Pan, Teddy Vesper, Crochetta, Twilleys of Stamford and DMC. We stock a variety of different yarn weights, including 4ply, double knit, aran, chunky, chenille and super chunky/bulky wool. Hand knitting can be as difficult or simple as you like, depending on the pattern/design you choose, but either way it is truly rewarding. There is something soothing, calming and quite magical about creating something out of nothing more than a pair of needles and the woven fleece of a sheep. Knitting something for yourself, or someone else, really is a labour of love. Why not knit something new today? It’s a great big knitting world out there ~♥~ Wool is a natural fibre, easy to work with and produces flexible, knitted garments that are cosy, warm, and durable. Wool is generally spun from the fur of sheep but can also be obtained from llamas, alpacas and goats. The most popular wool comes from sheep and it is also fab for felting. We stock a broad spectrum of yarn colour palette, from vibrant tones, rich hues and gentle pastel shades. Our excellent quality versatile yarn is perfect for knitting and crocheting garments for all ages, from newborn babies and toddlers to children and adults. If you need inspiration for your next knitting project, check out our knitting and crochet patterns. Whether you are looking for softspun baby DK for bootees, ultra fine 2ply, 3ply yarn for shawls, 4ply for sock knitting, craft cotton for dish cloths, space dyed inspirational yarns for Icelandic knitwear, pom pom yarn for creating baby blankets, chenille yarn for toys, or super chunky for an outsized throw, we have something for everyone. Click on this link for knitting wool, and this link for crochet thread and crochet cotton
Knitting Needle Size Conversion Chart
| Metric | UK | US |
| 2.50 mm | - | - |
| 2.75 mm | 12 | 2 |
| 3.00 mm | 11 | - |
| 3.25 mm | 10 | 8 |
| 3.50 mm | - | 4 |
| 3.75 mm | 9 | 5 |
| 4.00 mm | 8 | 6 |
| 4.50 mm | 7 | 7 |
| 5.00 mm | 6 | 8 |
| 5.50 mm | 5 | 9 |
| 6.00 mm | 4 | 10 |
| 6.50 mm | 3 | 10.5 |
| 7.00 mm | - | - |
| 8.00 mm | 0 | 11 |
| 9.00 mm | 00 | 13 |
| 10.0 mm | 000 | 15 |
| 12.0 mm | - | - |
| 15.0 mm | - | 19 |
| 20.0 mm | 0 | 0 |
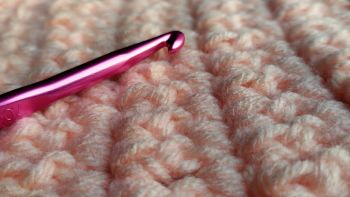
Crochet is a versatile craft and relatively easy to learn, you just need a hook and a ball of yarn/thread. The art of crochet is simple – you need to hold one hook and work one stitch at a time. There are two ways to hold the hook, a pencil grip where you hold the hook just like you would a pencil or pen, or a knife grip. For left handers, crocheting with the left hand is exactly the same as for right handers, but with the hook and thread in reverse position (hook in left hand, thread wrapped around the right hand). Once you have mastered the basic stitches, you can create some wonderful accessories for your home or garments for yourself. Go on, what’s stopping you :)
Crochet hook sizes differ depending on country, the brand of hook and even on the age of the crochet pattern. We have a superb range of crochet hooks available. Our Darice coloured hooks will add a splash of colour whilst you work, and our Prym plastic handle hooks are very comfortable to use if you suffer from arthritic fingers
Seasonal/Christmas Craft Ideas
Easy Christmas/Seasonal Craft Ideas:
Hand Made Hats Scarves Blankets Home made crafts are the nicest way to show someone that you really care. Why not make a very special and personal gift by knitting a pair of gloves and winter hat or scarf? We sell knitting looms in a variety of shapes and sizes, plus patterns and gorgeous winter-warm chunky yarn for knitting projects
Tunisian Crochet Afghan Blankets Why not make a very special gift for someone to keep them warm and cosy on cold winter nights - Tunisian crochet, also known as Afghan crochet, uses an elongated hook, just like a knitting needle with a stopper on the other end. Working with a Tunisian/Afghan hook forms a stitch that is similar to knitting which is used to create large flat pieces such as the blankets that have come to be called Afghans. We sell Prym Tunisian hooks, please click here for more details
Decorative Pine Cones Collect pine cones (Scots pine cones are the best ones we have tried) and carefully tap a nail into the bottom of each cone. Then either paint or decorate the cone with snow spray and hang in your window or from the Christmas tree using different lengths of festive red ribbon. We sell a wide range of superb traditional and modern ribbons, please click here
Personalised Messages If you already use cook's writing icing tubes then you will know that these are available in a wide range of colours. Dress up your Christmas dinner table with some very special "messages" for loved ones and friends. You can spell out festive messages using the sugar cubes by "piping" a letter on each cube and arranging decoratively around dinner plates or on table runners
Christmas Treats Fill brightly coloured glasses carefully with small amounts of brightly wrapped sweets, toffees and treats for that extra special touch. You can add delicious pink/white marshmallows, Turkish delight cubes, mini shortbread or home-baked biscuits
Christmas Gifts with Pom Poms Add a splash of style to your wrapped presents by making pom poms using a fluffy eyelash yarn and pom pom maker. We sell pom pom makers by Pony and Whitecroft which are plastic and, therefore, re-usable. These are more economical as they will last considerably longer than the handmade cardboard version! To see our pom pom makers and Darice pom pom looms, please click here
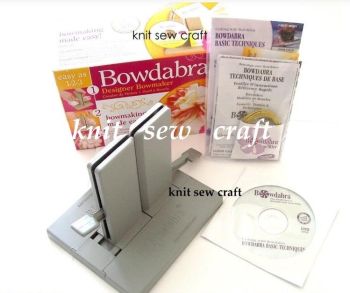
The Darice Mini Bowdabra and also the large Bowdabra Designer Bow Maker remain a very popular craft tool and favour maker. The Bowdabra is perfect for creating professional looking gorgeous ribbon bows on giftwrap and for creating sensational corsages, hair barrettes, party favours etc. More creative ideas for the large Bowdabra are: designer hand towel cakes, decorative pillows and cushions, floral arrangements, seasonal swags for pictures and mantles, christmas ornaments and tree toppers, decorative candles, table settings, bridesmaid's headpiece, flowergirl bouquet ball, storm candles, valentines wreath, topiary...
Please Click Here to Visit Our Shop
For more details of the products in our Crafts & Kits shop category,please click here
Copyright © 2004 - 2026 knitsewcraft.co.uk All Rights Reserved. Designated trademarks and brands are the property of their respective owners. Images are not to be reproduced without obtaining our permission. Use of this Website constitutes acceptance of our trading Terms & Conditions

